What Is Stable Diffusion Clip Skip? [Explained]
Stable Diffusion is an AI image generative model. It is one of the growing generative techs that employ a diffusion process in generating images. A unique characteristic of Stable Diffusion is that it is open source and allows users to tinker with its features and build added functionalities on its framework. A current trend among adventurous users is the clip skip.
Stable Diffusion’s generative process means that it creates images from noise in stages, progressively reducing noise till it gets the clearest and most fitting output. Clip skip is a setting that makes Stable Diffusion ignore the last few stages of the diffusion process. Doing this can hasten the generative process and give the user more image options.
Is the clip skip feature worth all the buzz around it? Does it really result in better images? And how can you explore it in Stable Diffusion for a more interesting art creation process? Dig in as I would discuss these and more in this article.
What Is Stable Diffusion Clip Skip?
Think of how a painting is done. The artist starts with a blank canvas and then uses his paintbrush to paint in strokes until the painting is complete. Stable Diffusion generates images in the reverse order.
While it is trained on actual clear images, the training process for Stable Diffusion’s neural network involved adding noise to these images and then learning to denoise them into images that match the user’s prompt.
Despite this distinction between traditional painting and Stable Diffusion’s image creation process, one obvious similarity is that they both do not take a leap from the first paintbrush or first noisy image to the final refined product.
The Generative Process
The generative process is gradual. Stable Diffusion’s neural network starts with a random noisy image and then gradually refines it until it matches the text prompt. The image generated at each stage is called a layer.
Stable Diffusion’s neural network is guided in the generative process by the CLIP (contrastive language-image pre-training) model, which generates a text embedding that represents the user’s prompt for the neural network to follow.
Here is where it gets interesting. You might be familiar with the fashion rule popularised by Coco Chanel, take off the last accessory you put on. The idea is that less is more when it comes to accessories.
Sometimes this applies to art as well. With the clip skip setting you are able to see the supposed unrefined look and decide if you prefer it to the final generated image.
The clip skip setting basically determines which layers of the CLIP model are used to generate an image. If the clip skip setting is set to 1, that means no layer is being skipped or ignored.
The generation process gets to the very last layer. If the clip skip setting is set to 1, then the last layer of the CLIP model is skipped, and so on.
In general, a higher clip skip setting will result in a more abstract image, while a lower clip skip setting will result in a more defined image. However, this is a general rule that might not always hold true.
How Do You Clip Skip in Stable Diffusion?
The first thing you want to do is make sure that you are using a Stable Diffusion model that has the clip skip setting. Stable Diffusion 1. x models like Automatic1111, vqgan-clip-diffusion-anime-v0, and vqgan-clip-diffusion-art-v0. You can find any of these on Stabl Diffusion Web UI or through the Hugging Face site.
Now, take the following steps. For this, we used Google Colab.
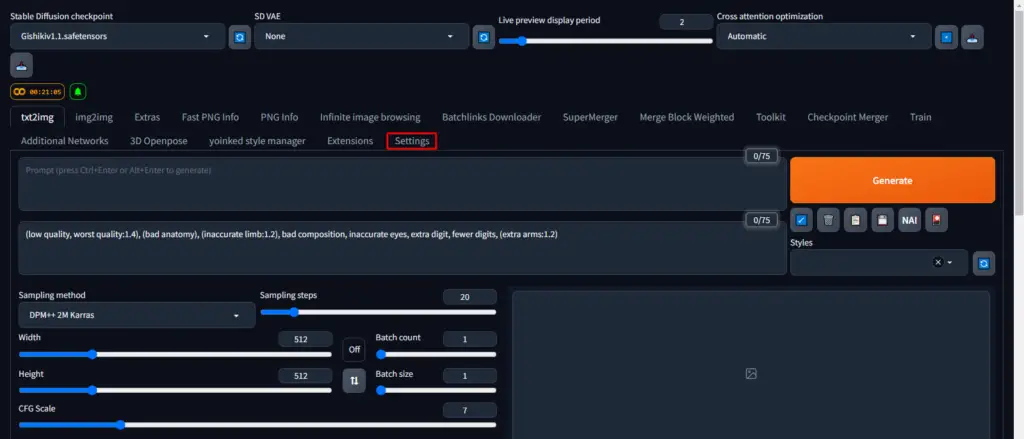
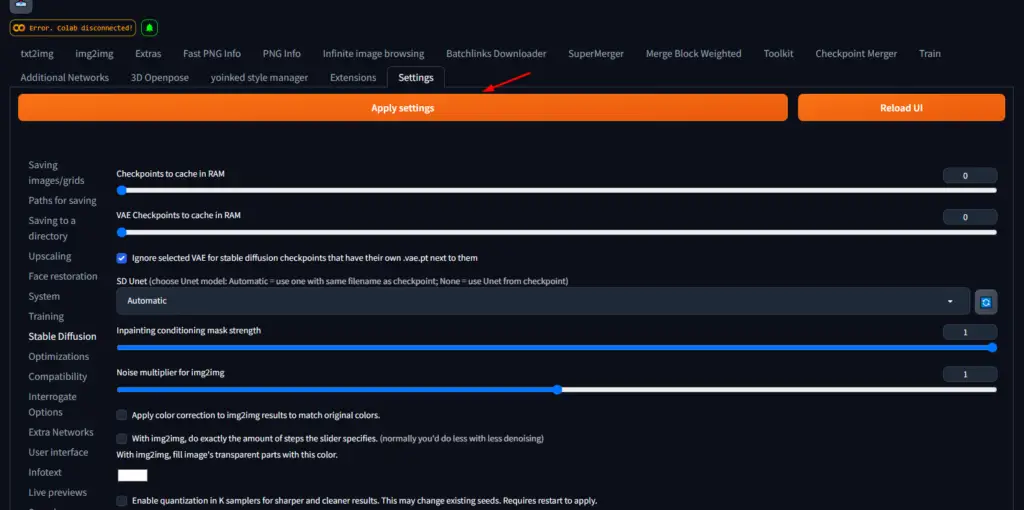
Step 1: Click on Settings on the Taskbar
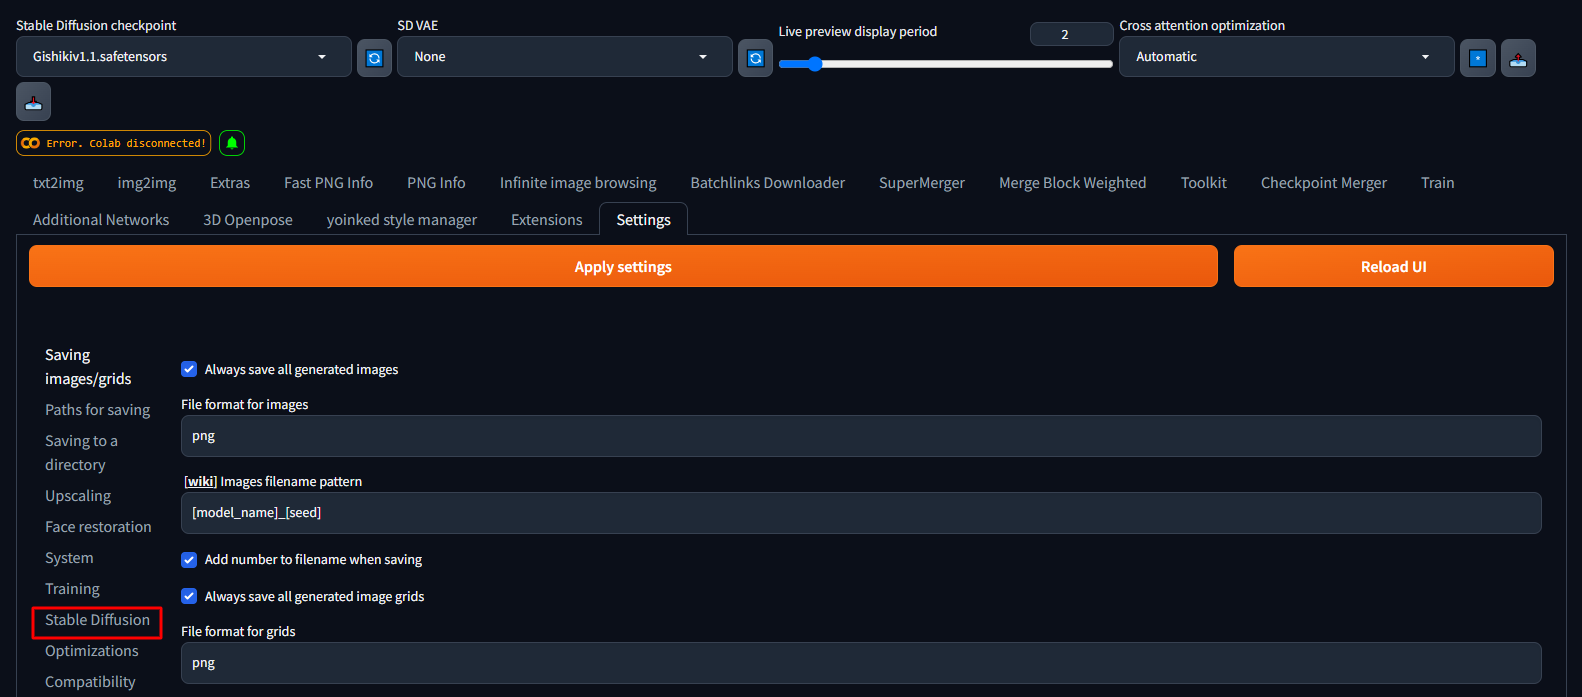
Step 2: Select “Stable Diffusion” on the Right Sidebar
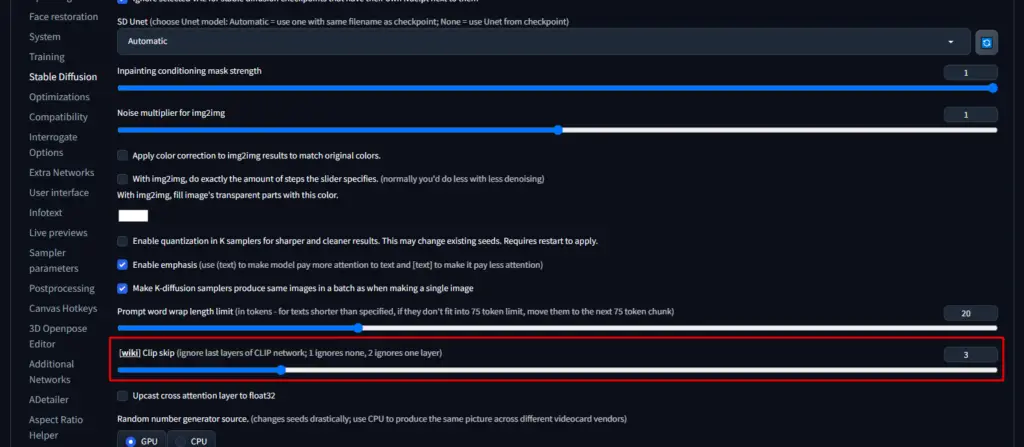
Step 3: Drag The Slider To Your Right
Scroll down till you see “Clip Skip.” Drag the slider to your right for a higher Clip skip value.
Step 4: Click on “Apply settings.”
It’s a good idea to generate a few images with different clip skip values to see which one you like best. This is the best way to find the right clip skip value for your image. If you are not sure what clip skip value to use, start with a low value, such as 2, then increase it to see other layers.
It is important to note that the effect of the clip skip value will also depend on the specific prompt that is used. For example, a prompt that is very specific will likely still result in a realistic image even if the clip skip value is high. However, a prompt that is more general will result in a more abstract image.
Ultimately, the best way to find the right clip skip value for your needs is to experiment with several values and see what results you get with each value. You may find that a higher clip skip value results in images that you prefer.
What Does Controlnet Do in Stable Diffusion?
ControlNet is a neural network structure that can be used to control diffusion models like Stable Diffusion. It was developed by Llyasviel and is available on GitHub.
ControlNet works by adding extra conditions to the diffusion model. These conditions can be used to control the generated image in a variety of ways, such as:
Changing The Image Composition
ControlNet can be used to change the composition of the generated image, such as the number of people in the image, the objects in the image, or the colors in the image.
Changing The Image Style
You can use ControlNet to change the style of the generated image, such as the artistic style of the image, the mood of the image, or the time period of the image.
Adding Constraints to the Image
ControlNet can also be used to add restrictions to the generated image, such as the size of the image, the resolution of the image, or the number of pixels in the image.
Transpose Selected Features
ControlNet can use a technique called “control diffusion” to generate images that are similar to the user’s upload in some specified respect. ControlNet first detects the details in the uploaded image and then diffuses the image based on the detected details.
The result is a totally new image bearing similarities to the user’s upload. This can be used to create a variety of different effects, such as copying compositions or human poses from a reference image.
In using Stable Diffusion, it is okay to experiment with its features across the several models that have been built around it. The Clip Skip certainly has mixed reactions. Don’t go with the naysayers though. Be sure to give it a try. It’s pretty easy to set up in Stable Diffusion’s settings as has been explained in this article.
Related Articles:
Using Midjourney Without Discord: What You Should Know
Can You Use Midjourney to Create NSFW Images?